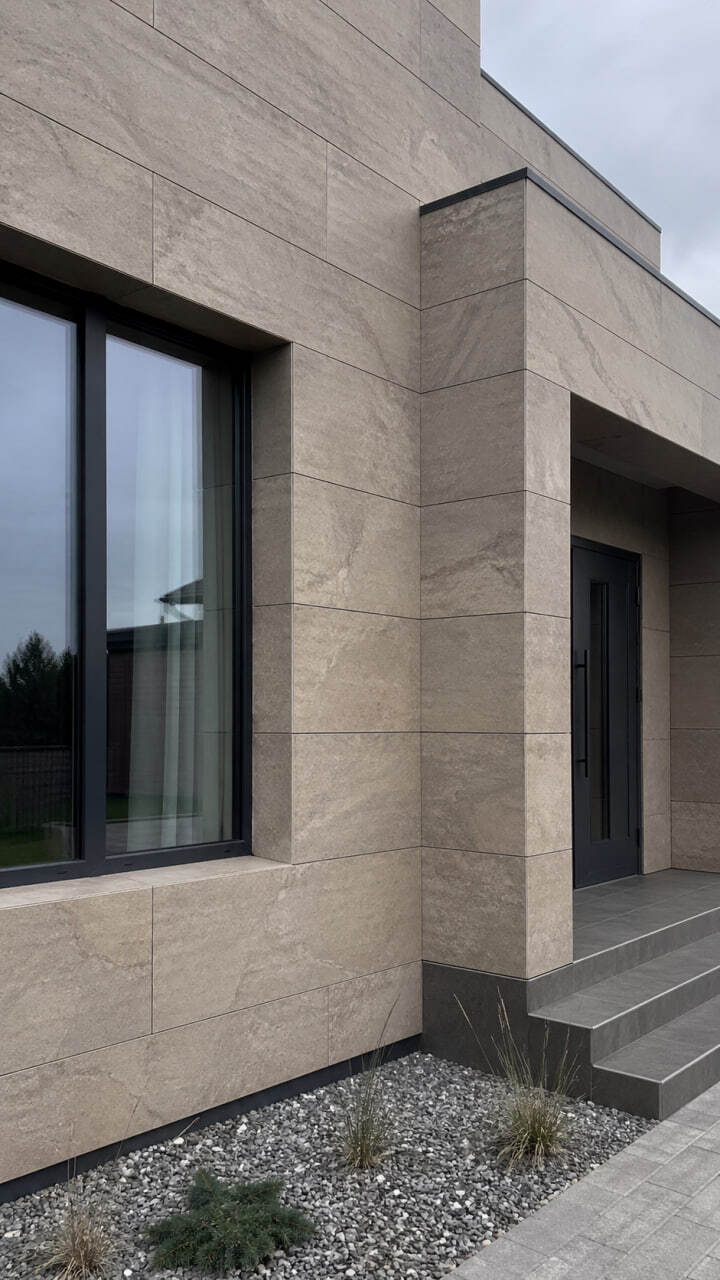
On a facade, an “expensive look” is not created by materials alone, but by precision. Most often, a facade looks premium or cheap because of its joints: straight geometry, consistent lines, and clean seams immediately raise the level of the project. Even an excellent texture can look poor if the joint lines start to “drift”.
Below are practical rules that help achieve neat installation and beautiful geometry.
1) Geometry Is More Important Than Speed
The main rule of installation: lines first — surface area second.
If you start rushing to cover square meters without proper marking, the end of the facade almost always reveals:
- wedge-shaped gaps and shifting rows
- different joint widths
- broken lines around windows and corners
From an installation point of view, correct preparation and control of the base lines must come first.
2) Create a “Zero” Line and Check It Constantly
For the facade to look straight, you need two reference points:
- horizontal level
- vertical plumb line
The work is then built from these lines:
- each row must not “wander” in height
- vertical joints must keep a consistent rhythm
3) Joints Must Have the Same Width
Nothing makes a facade look cheaper than uneven joints: 3 mm in one place, 8 mm in another.
That is why it is important to maintain:
- equal spacing
- consistent pressure when placing the elements
- careful adjustment before the adhesive sets
4) Cutting: Less Is Better, but It Must Be Planned
Cut pieces are always visible. To keep the facade looking clean:
- avoid thin “strips” at the end of a row
- it is better to shift the layout so that edge elements have a proper width
- cut pieces should be moved to less visible areas, such as behind a pipe, into a corner, or under an overhang
5) Windows and Corners: This Is Where the “Premium” Look Is Decided
Two areas immediately reveal the quality of the work:
Windows
Joints around windows must follow a clear logic:
- symmetry or a deliberate rhythm
- straight lines on the reveals
- neat connections and junctions
Corners
Corners cannot be finished “however it works out”. If the lines do not meet properly, the facade looks crooked.
That is why corners must be planned during the layout stage, not improvised during installation.
6) Adhesive and Substrate Control — Without This, Joints Will Not Help
Even perfect marking will not help if:
- the substrate is uneven
- primer has been skipped
- the adhesive thickness is inconsistent
Substrate preparation and priming are basic conditions for the elements to sit evenly and bond uniformly.
7) Why an Insulation System Requires Even More Precision
When the facade is installed as part of a full system, any mistakes in joints and connection points become more visible: microcracks may appear in some areas, while lines around reveals may shift in others. That is why Facade Insulation should be done with a carefully planned layout in advance, so that the joints look straight and logical across the entire surface.
8) When the Material Helps Achieve a Neat Result
Installation quality depends on skilled hands and correct technology. But the material also matters — especially when you need to maintain geometry in detailed areas. That is why KORDEKO Flexible Tile (PletaFlex) is often chosen for facades and complex zones: it helps work neatly around corners, reveals, and joints while maintaining a beautiful, premium rhythm when properly installed.
Conclusion: A Short Checklist for an “Expensive-Looking” Facade
- mark horizontal and vertical reference lines
- keep joint width consistent
- plan cuts carefully and avoid thin strips
- design windows and corners according to a clear layout logic
- ensure a strong substrate, primer, and the correct adhesive
With these rules, the facade looks neat and expensive even without complex design solutions.
KORDEKO Contacts
📱 Phone: +37368140333
🌐 Website: www.kordeko.com
📧 Email: kordeko.md@gmail.com