
Before insulating and cladding a facade, proper surface preparation is essential. This stage determines the durability and performance of the entire facade system. Old walls often have cracks, delamination, weak areas, and contamination that directly affect the adhesion of insulation and finishing tiles. In this article, we explain how to correctly prepare an old facade for insulation and cladding with KORDEKO flexible tiles.
Why You Should Not Insulate “As Is”
A common mistake is installing insulation and cladding over an old facade without proper inspection.
This leads to:
- insulation detachment
- cracks in the finishing layer
- moisture accumulation inside the walls
- reduced thermal efficiency
- a significantly shorter facade lifespan
Facade preparation is a mandatory step, not a formality.
Step 1. Diagnosing the Facade Condition
Before starting work, assess the following:
- presence of cracks (hairline and structural)
- peeling old plaster or paint
- voids and hollow-sounding areas
- signs of moisture, mold, or efflorescence
- condition of corners, window reveals, and the plinth
Tip: tapping the wall helps identify weak areas that must be removed.
Step 2. Removing Weak and Delaminated Layers
The following must be removed:
- loose or peeling plaster
- old paint with poor adhesion
- friable and crumbling areas
- dirt, grease stains, and dust
The substrate must be solid and stable—otherwise, the entire system will fail.
Step 3. Repairing Cracks and Defects
Depending on the facade condition:
- small cracks are opened and filled with repair compounds
- deep cracks are reinforced with fiberglass mesh
- chips and uneven areas are leveled with adhesive or repair mixes
❗ Important: do not leave cracks “for later”—once insulation is installed, fixing them is impossible.
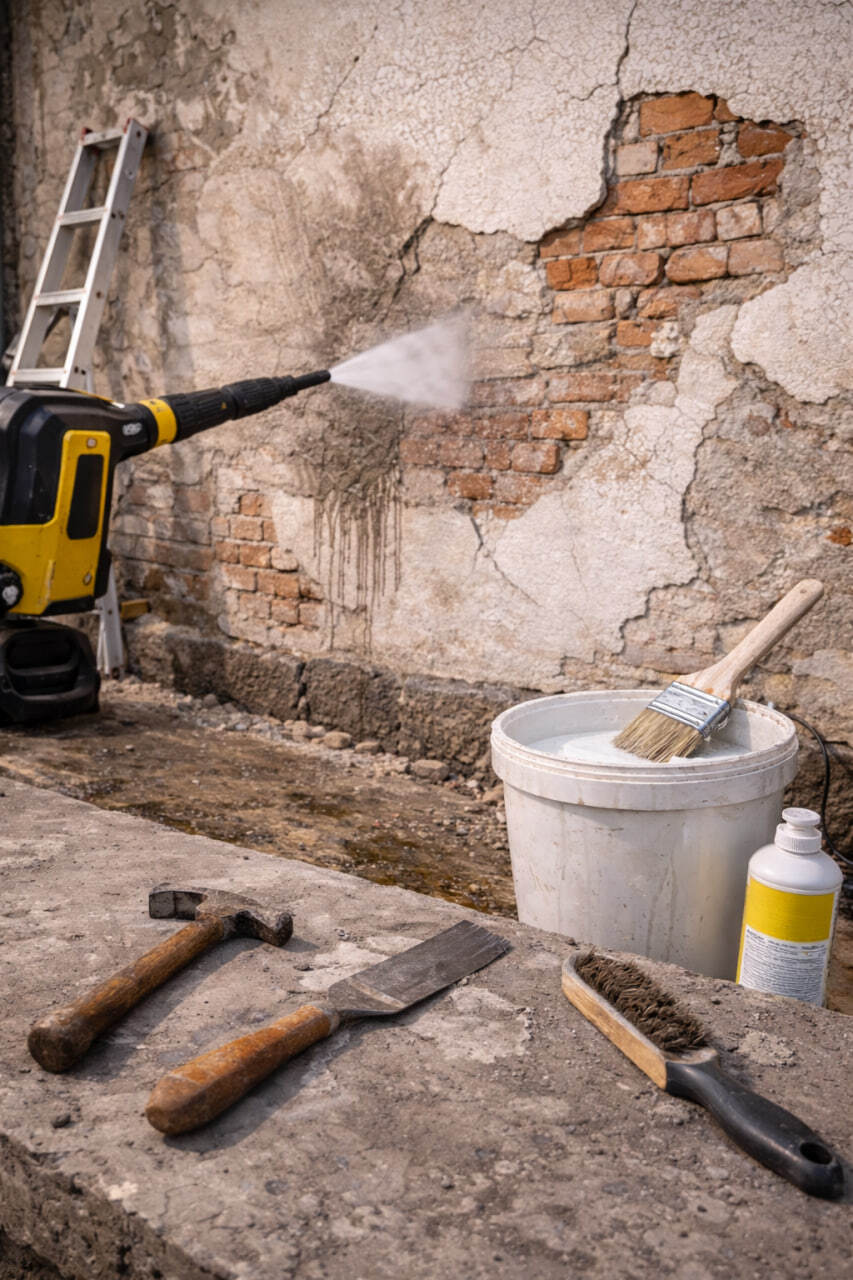
Step 4. Surface Cleaning
After repairs, the facade must be thoroughly cleaned:
- from dust and construction debris
- from remnants of old materials
- from biological contamination
If necessary, wash the surface with water at moderate pressure and allow it to dry completely.
Step 5. Priming the Walls
Priming is a key preparation step.
Primer selection:
- for absorbent substrates — deep-penetration primer
- for dense or low-absorption surfaces — adhesion (bonding) primer
Primer functions:
- binds residual dust
- equalizes surface absorbency
- improves adhesive bonding
- reduces the risk of delamination
Step 6. Geometry Check and Readiness for Insulation
Before installing insulation, make sure that:
- the surface is even
- there are no active cracks
- the walls are dry
- the primer has fully cured
Only then can you proceed with installing insulation (EPS or mineral wool).
Why KORDEKO Flexible Tiles Are Ideal for Renovation Projects
KORDEKO flexible tiles are especially suitable for old facades because they:
- are lightweight
- do not overload walls
- compensate for micro-movements of the substrate
- do not require rigid substructures
- adapt well to complex geometry
This makes them an ideal finishing material for building renovation.
Common Mistakes When Preparing an Old Facade
- Ignoring cracks
- Installing over a weak substrate
- Skipping the primer
- Insulating damp walls
- Rushing without allowing layers to dry
Avoiding these mistakes ensures long-term facade durability.
Proper preparation of an old facade is the foundation of a warm, reliable, and long-lasting home.
Inspection, cleaning, repair, and priming are essential steps before insulation and tile cladding.
With KORDEKO facade solutions, you get:
- a stable facade system
- high energy efficiency
- a clean, well-finished appearance
- long-term protection for decades
KORDEKO Contacts
📱 Phone: +37368140333
🌐 Website: www.kordeko.com
📧 Email: kordeko.md@gmail.com